Setting up and Customizing Accessibility Validation
To have eWebEdit400 check content for compliance with accessibility standards, follow these steps.
See Also:
Step 2: Use Dialogs to Enter Accessibility Information
Customizing Accessibility Checks
Step 1: Enable Accessibility
In the Ektron CMS400.NET Workarea, accessibility options appear on the Settings > Configuration > Setup screen under Accessibility/Section 508 Evaluation (below Editor Options). The options are explained below.
Do not validate - do not check content for compliance with accessibility standards
Warn if fails - the user is warned but allowed to publish the content
Enforce - the user must bring the content into compliance before submitting it for publication or publishing it; however, can save it or check it in after being warned.
Step 2: Use Dialogs to Enter Accessibility Information
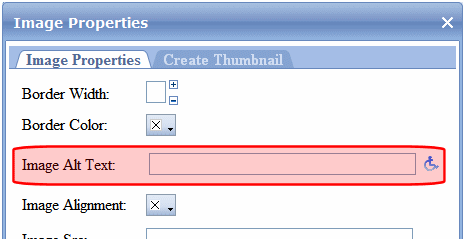
Several dialog boxes let the content editor enter accessibility information. An example is below.

The table below lists dialog boxes in which accessibility information can be entered.
|
Dialog |
Field |
How filled if no value exists |
|
Image Properties |
Image Alt Text: |
Uses the image’s title |
|
Table Wizard - Cell Properties Tab |
Abbreviation: Categories: |
Not automatically filled when no value exists |
|
Table Wizard - Accessibility Tab |
Caption: Summary: |
Not automatically filled when no value exists |
|
Hyperlink Manager (Includes Quicklinks) |
Tooltip: |
Contents of Link Text field copied |
Customizing Accessibility Checks
All standard accessibility checks are stored in the site root/Workarea/Content Designer/ektaccesseval.xslt file. If you want to customize which checks are applied, edit that file.
To change or disable the .xslt file that eWebEdit400 uses to validate for accessibility, edit this line of site root/Workarea/Content Designer/ValidateSpec.xml.
<validate>
<xslt id="ektaccesseval" name="Section 508 Validation" enabled="true" src="[srcPath]/ektaccesseval.xslt"/>


